
Inconsistent ultrasonic cleaning results usually come from changes in bath chemistry, temperature, loading, trapped air, or the distribution of ultrasonic energy. The cleaning cycle may stay the same while the conditions inside the tank change. Extending the cycle can sometimes improve removal, but it will not reliably correct an unsuitable detergent, an air pocket inside a hole, or a basket that blocks effective cleaning.
The most useful starting point is the pattern of failure. Parts that remain dirty in one tank location suggest a different problem from parts that become progressively dirtier throughout the day. Establish where and when the variation appears before adjusting settings.
Use the failure pattern to narrow the cause
Inspect failed parts before reprocessing them. Record the residue, its location, the basket position, and whether the problem appeared immediately after cleaning or only after rinsing and drying. Otherwise, useful evidence disappears during the next cycle.
These patterns guide troubleshooting; they do not prove a cause. For example, persistent residue in one recess may come from trapped air, but it can also reflect compacted debris or a contaminant that the selected chemistry cannot remove.
Check how parts are loaded before changing machine settings
Ultrasonic cleaning relies on cavitation: bubbles form and collapse in the liquid, creating local forces that help loosen contamination. Detergent chemistry supports the process by wetting surfaces and dissolving, dispersing, or emulsifying the soil. Both must reach the areas being cleaned.
A crowded basket changes those conditions. Nested parts restrict liquid exchange, contact points shield surfaces, and dense loads alter the acoustic field. A successful cycle with a few loosely arranged parts does not establish that the same settings will work with a full production basket.
Reduce the load for a controlled comparison. Separate parts, keep critical surfaces exposed, and use a fixture that holds them consistently without enclosing them unnecessarily. Support the basket as specified for the equipment; placing parts directly on the tank floor can impair performance and damage the tank.
Orientation deserves particular attention. A blind hole facing downward can retain an air pocket even when the part is fully submerged. Deep recesses may need tilting, rotation, or controlled movement so liquid enters and displaced air escapes. Small passages also need a path for loosened contamination to leave.
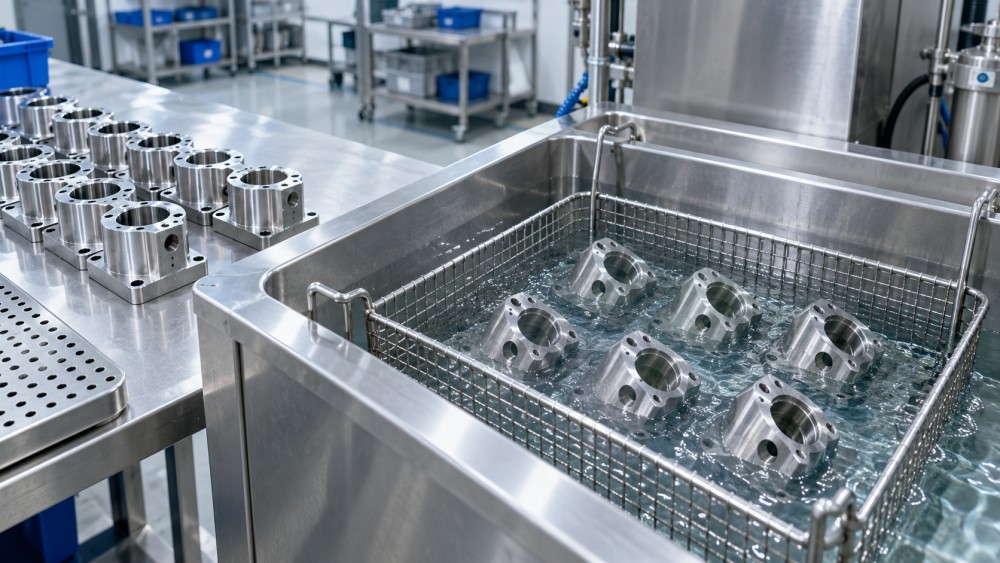
If a lighter load or different orientation restores cleaning, define a repeatable loading arrangement. Specify maximum part count, spacing, orientation, and fixture position. A loosely worded instruction such as “do not overload” leaves too much room for variation.
Separate bath chemistry problems from ultrasonic problems
Ultrasound helps remove contamination, but it cannot make every residue compatible with every cleaning solution. Machining oil, polishing compound, particles, and dried process residues may require different chemistry. A detergent that removes oil effectively may leave mineral deposits or cured material behind.
Check whether the incoming contamination has changed. A different lubricant, supplier, upstream process, or storage period can make an established cleaning cycle appear unreliable. Dried or heat-altered residues may respond differently from freshly deposited soil.
Use a cleaner suited to both the contaminant and the part material. Stronger chemistry is not automatically better: it may attack a surface, affect a coating, or leave residues that complicate rinsing. The process must remove soil while preserving the part’s required properties.
Concentration can drift even when nobody changes the recipe
Water evaporation, solution carried out on parts, makeup additions, and contamination all change the bath. Replacing every liquid loss with concentrated cleaner can increase detergent concentration, while topping up only with water can dilute a bath that has lost solution through carryout.
Measure concentration using a method appropriate to the cleaner. Titration or a supplier-supported instrument method may be useful. Refractometer readings can be affected by dissolved contamination, so an apparent concentration reading does not always represent active detergent. Record additions and follow a defined replenishment procedure.
A clear bath can still be exhausted
Appearance alone is a weak measure of bath condition. Dissolved residues and emulsified oils may remain difficult to see. As contamination accumulates, cleaning capacity can decline and removed soil may redeposit on parts.
Filtration helps control particles, but ordinary particle filters do not remove dissolved contaminants or all emulsified oils. Oil separation is useful when the cleaner releases oil into a separable phase. Bath maintenance therefore needs to match the contamination mechanism.
A fresh-bath comparison is especially useful when performance worsens with production volume. Keep loading, temperature, and cycle time unchanged. If results improve, investigate bath life and replenishment before increasing ultrasonic power.
Control temperature, degassing, and liquid level together
The temperature shown on a controller may differ from the temperature around the parts. A cold load can cool the bath, and some systems develop temperature differences across the working area. Starting a timed cycle immediately after loading can therefore produce different results from starting after the bath has stabilized.
Measure actual temperature in the working zone with a suitable instrument. Establish an operating range that fits the detergent, contaminant, and material, then define when the cleaning timer begins. Temperature should be a controlled condition, not simply a heater setting.
Higher temperature often improves chemical action, but heating indefinitely does not guarantee stronger cleaning. Changes in vapor content affect cavitation, and excessive heat can create material compatibility or residue problems. Use the validated temperature range for the application.
Freshly filled solution also contains dissolved gas that can interfere with effective cavitation. Degas it according to the equipment and chemistry instructions before processing parts. Major additions of fresh liquid may require renewed stabilization or degassing. Visible bubbling or surface movement alone does not show that the bath is ready.
Keep liquid level consistent as well. Level changes affect acoustic conditions, immersion depth, and heater coverage. Check the level under the operating conditions specified for the machine, allowing for displacement by the load.
Investigate acoustic coverage when loading and chemistry are stable
If defects consistently follow a tank position, investigate the distribution of ultrasonic activity. Reflections and interference can create stronger and weaker regions, while fixtures and loads modify that distribution. A tank can sound normal while cleaning poorly in part of its working volume.
Move equivalent contaminated parts between suspect and successful positions under otherwise identical conditions. If the defect follows the position, that supports an acoustic coverage or fixture-related explanation. If it follows a particular part feature, geometry or contamination deserves closer attention.
A manufacturer-approved foil test can help screen for uneven activity. Follow the specified placement and procedure, and remove foil debris afterward. Foil erosion is not a quantitative measure of cleaning power and does not establish that production parts meet cleanliness requirements. It provides supporting evidence alongside representative part tests.
When activity has changed without a process change, inspect maintenance history and equipment condition. Generator faults, damaged transducers, deteriorated bonding, or tank damage can affect performance. Electrical and transducer work should follow the equipment’s service procedures.
Frequency and power also need to suit the application. Lower frequencies generally create more aggressive cavitation, which can help with robust parts and difficult soil but may threaten delicate surfaces. Higher frequencies often provide gentler action suited to finer cleaning tasks. Neither choice guarantees success without suitable chemistry, loading, and acoustic coverage.
Compare equipment using representative parts and realistic loads. Rated electrical power alone does not reveal how effectively ultrasonic energy reaches critical surfaces.
Check whether the inconsistency starts after cleaning
A part can leave the ultrasonic bath acceptably clean and become contaminated during later handling. Dirty rinse water can deposit residue, insufficient rinsing can leave detergent, and uncontrolled drying can concentrate dissolved material into spots.
Inspect comparable parts after each stage to locate the problem. If surfaces look clean after washing but develop marks after drying, extending the ultrasonic cycle is unlikely to address the cause. Check rinse water quality, replacement practices, carryover, drying conditions, and handling equipment.
Visual inspection also has limits. A surface can look clean while retaining particles or a thin film that interferes with coating adhesion, bonding, or another downstream process. Choose an acceptance method that reflects the actual requirement. Particle extraction, residue analysis, or a relevant downstream performance check may be more informative than appearance alone.
Keep the inspection method consistent. Changes in lighting, sampling location, extraction technique, or acceptance criteria can make a stable cleaning process appear variable.
Run a controlled troubleshooting sequence
Changing several settings at once may produce a good batch without revealing why it improved. Use a reference condition and change one suspected variable at a time.
- Define the failure. Specify the residue, affected surfaces, and acceptance method. Separate remaining contamination from surface damage or drying marks.
- Establish a repeatable baseline. Record part condition, load arrangement, bath concentration, actual temperature, liquid level, degassing status, and cycle time.
- Test the strongest explanation. Compare lighter loading, corrected orientation, or a fresh bath according to the observed failure pattern.
- Check equipment performance if variation persists. Investigate position-dependent results and use the manufacturer’s acoustic assessment and service procedures.
- Confirm the corrected process under normal demand. Include realistic load variation, bath aging, and rinse and drying conditions before accepting the change.
Once cleaning becomes repeatable, turn the successful conditions into operating limits. Define loading rules, bath preparation, concentration checks, temperature range, replenishment triggers, and cleanliness acceptance. Set maintenance and bath-change criteria from process performance rather than an arbitrary calendar interval.
Before replacing a machine or lengthening every cycle, confirm whether variation follows the part, the basket position, the bath’s age, or a later processing stage. That distinction gives the next adjustment a clear purpose and makes the resulting improvement easier to sustain.