
A machined part can look clean while oil remains inside a blind hole or fine particles stay trapped beneath a shoulder. Those residues may weaken coating adhesion, contaminate an assembly, or interfere with downstream testing. To validate ultrasonic cleaning, define measurable cleanliness limits, establish a controlled cleaning cycle, and demonstrate that representative parts consistently meet those limits under justified worst-case conditions.
When engineers ask, “How do we validate an ultrasonic cleaning process?” the key distinction is between checking the cleaner and proving the outcome. Evidence that a tank produces cavitation is useful, but it does not prove that a loaded basket of production parts is clean. Validation must connect equipment performance, operating conditions, sampling methods, and actual residual contamination.
Start with the contamination that could cause failure
Before selecting tests, identify what must be removed and why it matters. Review upstream machining, polishing, handling, storage, and any previous washing steps. Potential contaminants include cutting fluids, grease, polishing compounds, metal fines, salts, and detergent residues. Each may require a different measurement method.
Translate downstream requirements into acceptance criteria. A coating process may be sensitive to organic films; a fluid component may require limits on particle size and count; an electrical assembly may be affected by ionic residues. A general statement such as “visibly clean” cannot adequately distinguish these risks.
- Define the inspection unit: an individual part, a specified surface area, an assembly, or a controlled group of parts.
- Specify the residue measure: particle count, maximum particle size, extracted residue mass, or concentration of a target contaminant.
- Set the acceptance limit: use applicable product specifications, customer requirements, or a documented engineering assessment linked to function.
- Include material condition: cleaning must not introduce unacceptable corrosion, discoloration, dimensional change, or surface damage.
Do not borrow a cleanliness limit from an unrelated product simply because it is available. Where no established specification exists, the quality and engineering teams need to justify limits using product risk and downstream performance evidence before qualification begins.
Define the process boundary and the challenge parts
Validation should cover the complete sequence that determines final cleanliness: any pre-cleaning, ultrasonic washing, rinsing, drying, and protected handling. A clean part can acquire new residue from a contaminated rinse, an unsuitable drying method, or packaging before inspection. Record where the validated process begins and where the finished part is sampled.
Select parts that represent the hardest credible cleaning conditions. Relevant features include blind holes, narrow passages, overlapping surfaces, rough finishes, and recesses that retain air or liquid. Grouping parts into families can reduce testing, but the grouping needs a technical basis: similar material, contaminant, geometry, loading, and cleanliness requirements.
The challenge also includes the soil. Fresh machining oil may behave differently from dried oil or a baked-on compound. Specify the contamination source, its application where challenge parts are deliberately prepared, and the maximum allowable delay before cleaning. Artificially soiled samples are useful only when their contamination reasonably represents production conditions.
Use realistic loading. Basket material, part spacing, orientation, immersion depth, and stacking can change acoustic exposure and fluid access. A validation performed with a few freely suspended parts does not automatically support a tightly packed production basket.
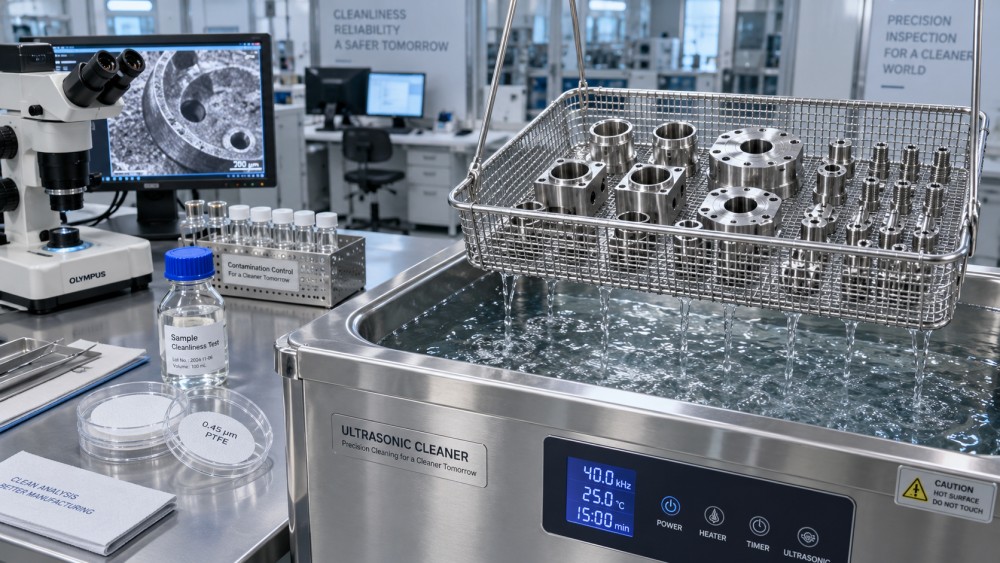
Establish equipment readiness before testing cleanliness
Confirm that the installed system can maintain and record the conditions required by the proposed process. This includes tank configuration, transducer operation, heaters, timers, circulation, filtration, and rinse equipment. Verify relevant instrument calibration and check that operating procedures describe filling, solution preparation, degassing, loading, and maintenance.
In regulated environments, these activities may be organized as installation qualification, operational qualification, and performance qualification. The terminology is less important than the evidence: the equipment is correctly installed, it operates across its intended range, and the complete process works with production-representative loads.
Assess ultrasonic activity using a suitable diagnostic method. Foil tests can reveal broad differences in activity, while appropriate acoustic or cavitation measurement tools can support more structured mapping. Control the test setup so that results can be compared over time. These diagnostics are equipment checks, not substitutes for residue testing; foil erosion does not directly quantify cleanliness and can introduce debris unless managed separately.
Convert a recipe into a justified operating window
A validation protocol should specify both nominal settings and allowable ranges. Record actual conditions where practical rather than relying solely on control-panel settings. For example, the bath may not have reached its required temperature when the cycle starts, even though the heater setpoint is correct.
Challenge the conditions most likely to reduce cleaning effectiveness, including maximum loading, difficult basket positions, and the proposed end of bath life. Also test conditions associated with damage, such as the upper permitted chemical concentration or exposure. Do not assume that every parameter has a simple “higher is better” relationship.
When several factors interact, a structured experimental design can help identify a robust window. Combining every unfavorable extreme into one trial may create an unrealistic condition or obscure which factor caused failure. Document the rationale for the combinations tested.
Select tests that can detect the relevant residues
Visual inspection is a useful first screen for gross contamination, staining, and damage. Define lighting, viewing conditions, magnification where needed, and inspection locations. However, a passing visual result cannot establish the absence of thin films, dissolved residues, or small particles.
Particles and extractable residue
For particulate cleanliness, a controlled extraction followed by filtration and microscopy can measure particle count and size distribution. Gravimetric analysis can quantify collected residue mass when sufficient material is present, but it does not show whether that mass consists of many small particles or one critical large particle.
The extraction procedure needs verification. It must recover contamination from relevant surfaces without generating particles from the component itself. Include suitable blanks for extraction fluid, containers, filters, and handling. Repeated extractions can help assess extraction completeness, provided the interpretation distinguishes remaining contamination from material shed during testing.
Organic and ionic contamination
Nonvolatile residue testing can indicate extractable residue, but it does not identify individual substances. Total organic carbon analysis may be useful for certain organic residues when the extraction and analytical method are suitable. It is not a universal oil detector: recovery, solubility, background carbon, and contaminant composition affect interpretation.
Conductivity can support monitoring of some ionic contamination, particularly in rinse water, but it cannot demonstrate removal of nonionic oils. More specific analytical methods may be necessary when a particular chemical residue drives risk. Select the method around the contaminant, not around whichever instrument is easiest to access.
Water-break or contact-angle testing can provide information about surface wetting. Treat these as screening tools unless their relationship to the required cleanliness level has been established. Surface texture, material, and surface treatments can affect the result independently of contamination.
For every method, establish adequate sensitivity, recovery, repeatability, and sample stability. The reporting limit must support the acceptance criterion. A result reported as “not detected” is insufficient if the method cannot detect contamination at the level that matters.
Run qualification trials with a predefined sampling plan
Approve the protocol before execution. It should identify the part families, challenge conditions, operating ranges, analytical methods, sampling locations, acceptance criteria, and rules for handling deviations. Include a justified number of independent runs and samples based on process variability and failure risk; no universal run count proves every ultrasonic process.
- Prepare and document the challenge. Record part identification, contamination condition, storage delay, basket arrangement, and bath condition.
- Execute the complete cycle. Capture actual operating values, interruptions, replenishment, rinse conditions, and drying conditions.
- Sample the difficult locations. Include poorly exposed basket positions and hard-to-clean features, not only accessible outer surfaces.
- Protect the samples. Use controlled handling, suitable containers, and defined hold times to prevent contamination after cleaning.
- Evaluate all specified outcomes. Review analytical cleanliness results together with visual condition and material integrity.
Pooling samples can conceal a failing part by averaging its residue with cleaner parts. Use individual-part results when the specification applies to each component, or justify pooling and its interpretation explicitly. Destructive extraction may require separate samples for functional or surface-damage testing.
A passing average should not override an individual failure where every part must comply. Investigate failures before repeating trials: possible causes include trapped air, incorrect concentration, inadequate rinsing, analytical contamination, or a genuine limitation of the operating window. Retesting without an assigned cause does not establish control.
Maintain the evidence during production
The validation report should connect the approved protocol to raw data, deviations, investigations, and conclusions. State exactly which parts, loading configurations, chemical ranges, bath conditions, and downstream steps are supported. Any exclusions or unresolved limitations should remain visible in the production instructions.
Routine controls should target the factors shown to affect results. These may include concentration checks, temperature and cycle records, loading verification, rinse monitoring, and periodic ultrasonic activity checks. Set bath replacement rules using demonstrated performance rather than appearance alone. A clear-looking solution may still contain unacceptable dissolved contamination.
Use periodic product cleanliness testing to confirm that process monitoring remains meaningful. Equipment indicators show that operating conditions are being maintained; product tests show that those conditions still deliver the required outcome. Keep enough traceability to associate a tested part with its batch, cleaner, recipe, and bath status.
Review changes before implementation. A new detergent, revised fixture, different part geometry, increased load, transducer replacement, or altered rinse sequence may invalidate part of the existing evidence. The response can range from documented verification to partial or full revalidation, depending on the change’s effect. When production repeatedly approaches a cleanliness limit, investigate the trend before simply lengthening the cycle: extra exposure may conceal bath deterioration while introducing material damage.