Why appliance casing welding defects escalate so quickly on the line
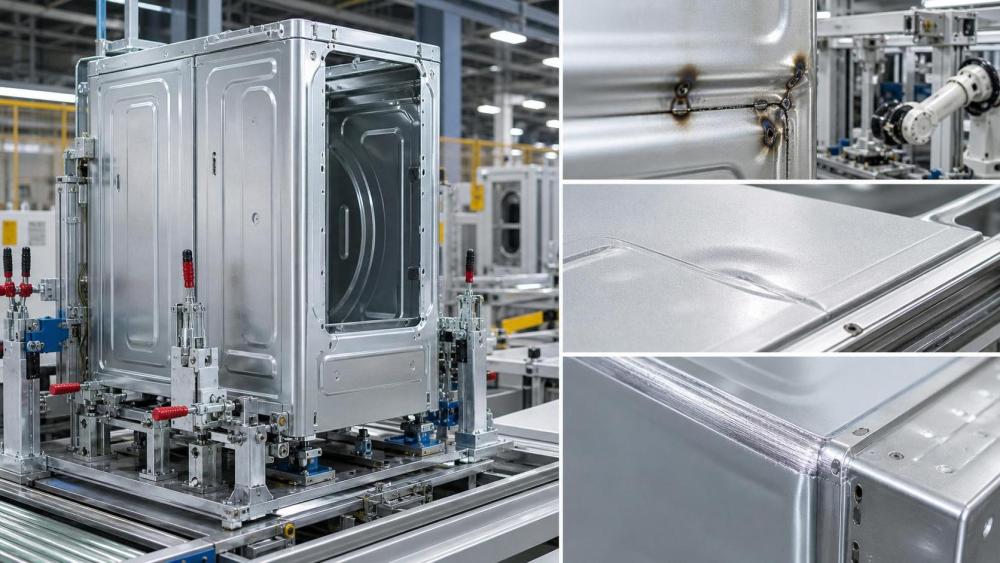
Appliance casing welding often looks simple until thin sheet variation, cosmetic standards, and takt time start pulling in different directions.
A small instability can become burn-through, panel distortion, missed fit-up, or visible rework within a few stations.
That matters because outer casings carry more than structural duty. They affect appearance, noise control, coating quality, traceability, and final assembly accuracy.
In practical production, the real issue is rarely welding current alone. Appliance casing welding quality depends on cleaning, clamping, heat input, material consistency, and downstream finishing.
This is also why process-support systems matter. A line with unstable surface condition, poor part identification, or inconsistent batching will usually struggle to stabilize weld results.
Across advanced manufacturing, GIAS often frames quality around microscopic control. That logic fits appliance casing welding well, because tiny process shifts create visible defects fast.
Actual production conditions change what counts as a welding risk
Different casing programs do not fail for the same reason. A refrigerator side panel behaves differently from a compact microwave shell or a coated washer enclosure.
The first variable is sheet thickness and joint type. Thin lap joints usually face burn-through risk earlier than reinforced seams or stiffened corners.
The second variable is surface condition. Oil residue, oxide, pretreatment carryover, and coating contamination all change arc stability and fusion behavior.
The third variable is appearance sensitivity. Some internal brackets can accept minor discoloration, while front-facing appliance casing welding must hold shape and finish much more tightly.
Production rhythm also matters. In low-volume cells, operators may compensate for variation manually. On high-volume lines, that same variation turns into recurring rework and scrap.
A quick way to compare common welding situations
The table below shows why appliance casing welding decisions should follow the operating context instead of a single universal setting window.
When burn-through is the main complaint, the problem usually starts before the arc
Burn-through in appliance casing welding is often blamed on excessive current, but that explanation is incomplete.
In many lines, the larger cause is stack-up variation. Small gaps, inconsistent edge condition, or loose fixture pressure concentrate heat into a narrow zone.
This shows up more often on thin galvanized steel, stainless skins, and corner transitions where heat cannot dissipate evenly.
Another common trigger is contaminated metal. Residual oil or pretreatment chemicals can destabilize the process, forcing operators to compensate with settings that overshoot sound fusion.
In actual application, a stable cleaning step can be as important as the welding power source. Ultrasonic cleaning or controlled pre-weld surface preparation helps remove variables that operators cannot see.
- Check whether burn-through clusters around one fixture, one shift, or one material batch.
- Measure joint gap before adjusting current. Heat settings often reveal a fit-up issue rather than create it.
- Review edge cleanliness and handling steps, especially after stamping, oiling, or storage.
- If mixed materials are used, separate parameter windows instead of forcing one compromise recipe.
Distortion becomes harder to fix on larger panels and visible surfaces
Distortion in appliance casing welding is not just a cosmetic defect. It can shift door alignment, reduce sealing performance, and complicate coating or final assembly.
Large refrigerator and laundry appliance panels are especially sensitive because heat accumulates over long seams and flat areas move easily.
Here, weld sequence matters as much as weld quality. A technically acceptable seam can still leave the panel bowed if the heat pattern is unbalanced.
A frequent mistake is adding stronger clamps without checking stress release after unclamping. That may hide movement during welding and reveal it later in inspection.
More reliable control usually combines shorter stitch planning, balanced sequence design, fixture contact optimization, and realistic cooling intervals.
Where downstream electrostatic coating is required, panel flatness deserves extra attention. Distorted surfaces can affect coating consistency and visual finish, even when the weld itself passes strength checks.
What to review before changing equipment
- Whether the seam location can be redistributed to reduce continuous heat concentration.
- Whether the fixture supports the neutral axis of the panel instead of only edge restraint.
- Whether rework grinding is adding more heat and worsening shape error.
- Whether incoming sheet flatness already sits near the tolerance limit.
Rework patterns often reveal process-control gaps, not isolated welding mistakes
Repeated rework in appliance casing welding usually follows a pattern. The same station, model variant, or surface finish keeps generating similar defects.
That is where broader auxiliary control becomes relevant. Traceable part coding, controlled batching, and stable maintenance records help connect weld defects to upstream variation.
For example, if rework rises after material changes, the issue may involve coating thickness, hardness, or lubricant carryover rather than operator technique.
If defects follow certain lots, marking and coding systems make the correlation easier to prove. Without that visibility, appliance casing welding problems look random and stay expensive.
This is one reason industrial intelligence platforms focus on the full support chain. Welding quality is rarely isolated from cleaning precision, identification accuracy, or environmental control.
Different casing programs need different judgment priorities
A useful review method is to compare the production goal before deciding how appliance casing welding should be optimized.
The point is not to overcomplicate the line. It is to avoid treating every appliance casing welding job as if the same defect carries the same business risk.
Misjudgments that keep defects in circulation
One persistent misjudgment is focusing on machine settings while ignoring incoming part condition. That shortens troubleshooting time at first, then extends rework later.
Another is assuming similar appliance models share the same welding window. Minor differences in panel geometry, coating, or reinforcement can change heat behavior significantly.
Cost analysis also gets distorted when only scrap is counted. Appliance casing welding rework can also affect coating consumption, labor balance, energy use, and delivery reliability.
A further blind spot is poor maintenance discipline. Worn fixtures, contaminated contact surfaces, unstable extraction, and unverified parameter recipes all create defect drift that looks operator-related.
Practical next steps for a more stable appliance casing welding process
A better improvement path starts with defect mapping by product area, joint type, material batch, and line condition.
Then review the support chain around appliance casing welding, including cleaning quality, part coding, fixture wear, and post-weld finishing impact.
- Separate burn-through, distortion, and cosmetic rework instead of using one broad defect category.
- Confirm actual surface condition before each parameter revision.
- Build model-specific control windows for high-mix production.
- Tie welding records to traceability data so recurring causes can be verified quickly.
- Review whether upstream cleaning and downstream coating requirements are aligned with the weld plan.
When appliance casing welding is evaluated through real operating conditions, defect reduction becomes more precise and less reactive.
The most useful next move is to define the exact application scenario, compare its constraints, and set controls around the defect that carries the highest downstream cost.