Why does surface treatment engineering adhesion improvement matter so much?
Strong adhesion rarely depends on the adhesive or coating alone.
In many industrial processes, the real difference starts at the surface.
That is why surface treatment engineering adhesion improvement keeps receiving attention across electronics, metalworking, plastics, packaging, medical parts, and precision manufacturing.
A bonded part may look acceptable at first, then fail after heat, vibration, moisture, cleaning chemicals, or storage.
In practical terms, better adhesion means fewer coating defects, less peeling, stronger sealing, and more stable downstream quality.
It also links directly with other auxiliary systems.
Ultrasonic cleaning affects contamination control.
Vacuum systems can support drying, degassing, and coating stability.
Surface preparation quality may even affect marking clarity and later traceability.
This broader process view is exactly why industrial knowledge platforms such as GIAS organize surface treatment topics beside cleaning, vacuum, coating, and process-support technologies.
The central idea is simple.
Microscopic surface control often determines macroscopic product reliability.
What actually changes when a surface is prepared for stronger bonding?
Surface treatment engineering adhesion improvement usually works through four practical mechanisms.
- Removing oils, dust, oxides, release agents, and fine residues.
- Raising surface energy so liquids wet the surface more evenly.
- Creating controlled roughness for mechanical interlocking.
- Changing surface chemistry so primers, inks, coatings, or adhesives attach more effectively.
These effects sound similar, but they solve different problems.
A clean but low-energy plastic may still reject coating.
A rough metal surface may still fail if oxide layers remain unstable.
This is why the best method depends on the material and the final duty condition.
Common treatments include solvent or aqueous cleaning, ultrasonic cleaning, plasma, corona, flame treatment, etching, blasting, phosphating, anodizing, and primer application.
Not every process needs a complex sequence.
More often, reliable bonding comes from matching one or two treatments to one defined surface problem.
A quick way to judge the surface condition
Before changing a line, it helps to separate visible cleanliness from bond readiness.
Which materials usually need more attention before bonding?
Some substrates are naturally easier to bond than others.
Metals often bond well after oxide control and cleaning, but they can vary widely.
Aluminum may require oxide management.
Stainless steel may need abrasion or activation.
Galvanized surfaces can introduce coating compatibility issues.
Plastics are even more sensitive.
Low-surface-energy materials such as PE, PP, and PTFE often resist wetting.
For these, surface treatment engineering adhesion improvement may depend on plasma, corona, flame treatment, or a suitable primer.
Composites and coated films introduce another layer of complexity.
The bond may fail inside the substrate layer rather than at the top surface.
Rubber parts can also carry mold release residues that are hard to see but easy to blame on the adhesive later.
A more reliable approach is to ask three questions early.
- What exactly is on the surface after forming, machining, or storage?
- How does that material behave under heat, moisture, and chemicals?
- Will the surface stay stable long enough between treatment and bonding?
That last point is often overlooked.
A treated plastic can lose surface activation over time, especially if handling and storage conditions are uncontrolled.
How do you choose between cleaning, roughening, activation, and primers?
The useful question is not which method sounds advanced.
It is which method removes the real barrier to adhesion.
If oil residue is the issue, cleaning comes first.
If the liquid spreads poorly, surface activation becomes more relevant.
If the bond needs better anchoring on metal, controlled roughening may help.
If material chemistry remains difficult, a primer may bridge the gap.
In real production, combined methods are common.
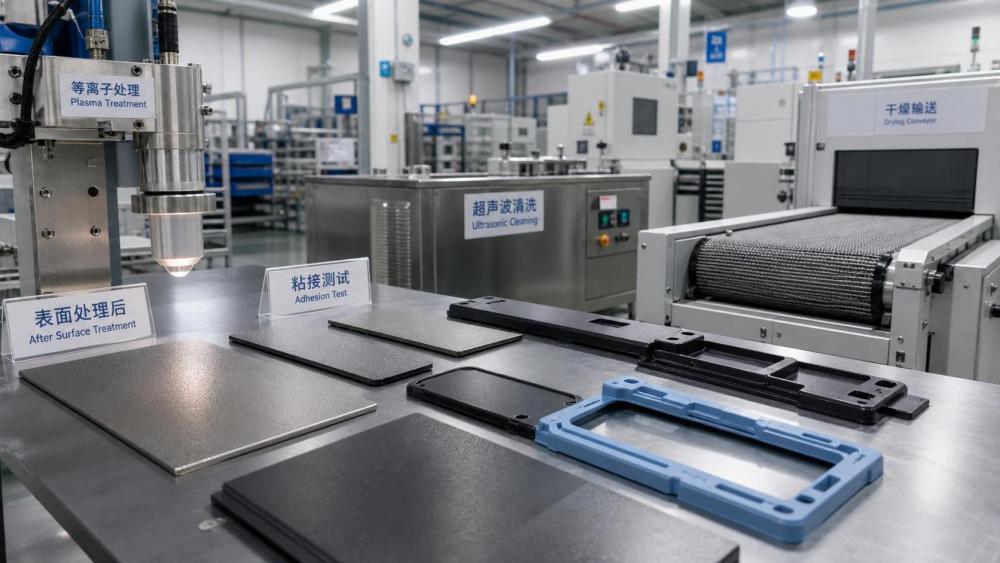
For example, ultrasonic cleaning may remove micron-level contamination, then plasma treatment improves wetting before coating or bonding.
That sequence fits well with the broader auxiliary-system logic seen across advanced manufacturing lines.
The table below can help narrow the choice.
Why do some adhesion improvements fail after scale-up?
Lab success does not guarantee line stability.
Surface treatment engineering adhesion improvement often breaks down during scale-up for process reasons, not theoretical ones.
One common problem is timing.
The surface is treated, then waits too long before bonding.
Another is incomplete drying.
Residual moisture or cleaner traces can weaken the interface.
Line contamination is another major source of variation.
Gloves, trays, packaging films, and compressed air can reintroduce residues after treatment.
Then there is process mismatch.
A surface may be ideal for one coating viscosity, but not for another.
Cure temperature, pressure, and dwell time can also hide the true root cause.
When troubleshooting, it helps to review the full chain instead of only the adhesive or coating.
- Incoming surface condition
- Cleaning effectiveness
- Drying and storage control
- Treatment-to-bonding time
- Application parameters and curing profile
- Final durability testing
This broader review usually explains why a bond that passed initial pull testing later fails in service.
What is a practical starting point for better adhesion on the shop floor?
A useful starting point is to build a simple surface control routine.
Keep it measurable and easy to repeat.
Begin with the current defect pattern.
Is the problem poor wetting, edge peeling, blistering, inconsistent bond strength, or early corrosion around the bonded area?
From there, define a short verification plan.
- Record the substrate type and its incoming condition.
- Check whether contamination is visible, transferable, or chemical.
- Measure wetting or surface energy where possible.
- Control the time gap between treatment and bonding.
- Use one durability test, not only an immediate strength test.
For many lines, that alone reveals where surface treatment engineering adhesion improvement should focus.
It may point to better cleaning chemistry.
It may show the need for plasma activation.
It may also show that storage and handling are undoing a good treatment process.
Reliable adhesion is rarely one isolated step.
It is a controlled sequence linking cleaning precision, surface condition, environmental stability, and final application performance.
That is also the wider lesson behind GIAS content.
Auxiliary systems may sit in the background, yet they often decide whether the finished product remains durable, compliant, and consistent.
The next sensible step is to map your material, contamination type, treatment window, and validation method together.
Once those four points are clear, stronger bonds become easier to predict instead of easier to hope for.